Navigation
Install the app
How to install the app on iOS
Follow along with the video below to see how to install our site as a web app on your home screen.
Note: This feature may not be available in some browsers.
More options
Style variation
-
Domain Change - We have moved to https://paste-and-cut.com as our new domain.
If you are using shortcuts or bookmarks for the old paste-and-cut.com.au domain, you need to update these or they will cease working from the 25th January, 2025. Please check the notice post for more details on this change to the forum.
You are using an out of date browser. It may not display this or other websites correctly.
You should upgrade or use an alternative browser.
You should upgrade or use an alternative browser.
Restored and saved.
- Thread starter Dan.05
- Start date
")
Substance
Member
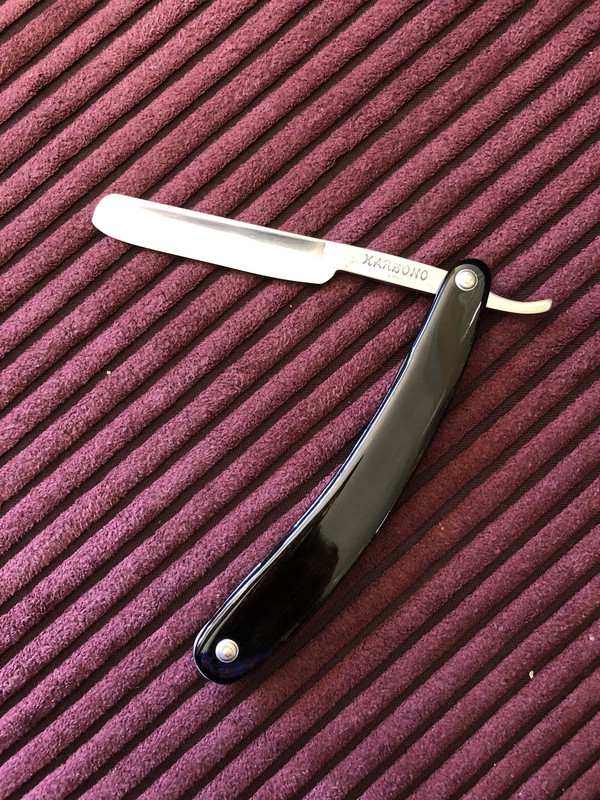
Great work mate
you gotta start somewhere cos that's how we learn & definitely no need to rush these things
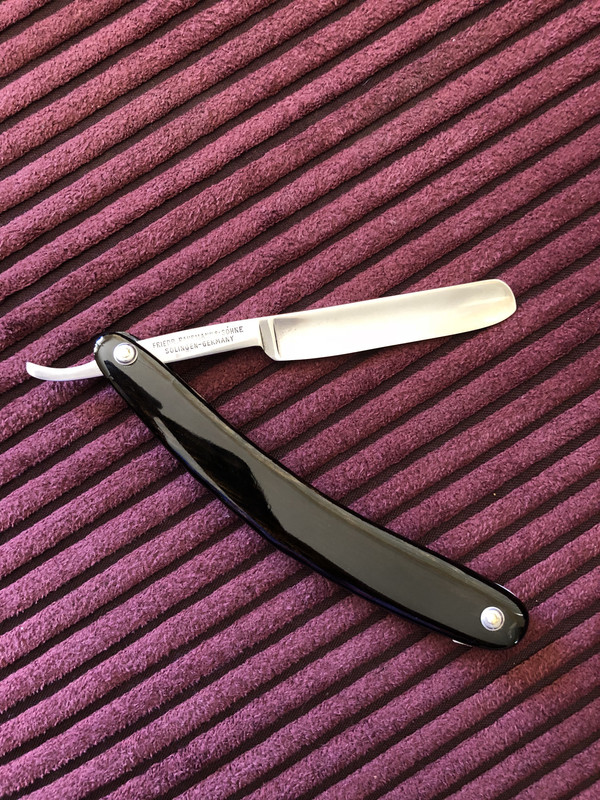
looks like you have a bit of work to do on the hones for the bevel set, or is the wave in the blade just an illusion
some nice grain in the horn & the new dome Washers look sweet too
have you got a before pic?
are they the original scales or did you make full new ones?
as they look a little big for the blade size that's all?
did you reclaim the wedge or all new also?
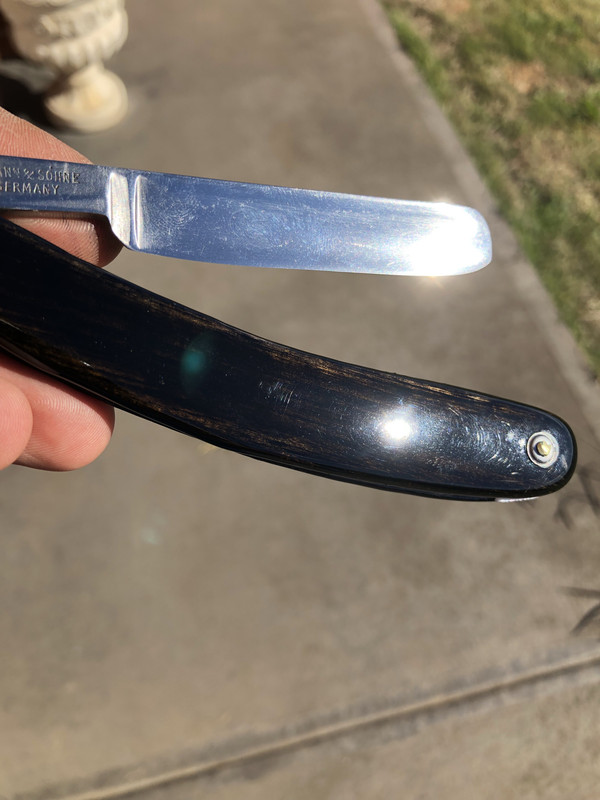
I note the pin in the lower pics looks a little high still ( you could file it & peen some more maybe), for pinning I usually peen the 1st end of the pin about 1mm to fit the washer then, assemble, cut & file the 2nd end of the pin to only about 1mm above the washer when pushed together tight, this allows for a fairly flush peening on the pins without excess mushrooming,
this is not as bad with Brass but nickel silver & Stainless pins like to split at the edges when peened over if left to long
It's great to see blades returned from the dark places they are abandoned to and given a rebirth ready to clear whiskers as they were intended for another life time or 2
you gotta start somewhere cos that's how we learn & definitely no need to rush these things
looks like you have a bit of work to do on the hones for the bevel set, or is the wave in the blade just an illusion
some nice grain in the horn & the new dome Washers look sweet too
have you got a before pic?
are they the original scales or did you make full new ones?
as they look a little big for the blade size that's all?
did you reclaim the wedge or all new also?
I note the pin in the lower pics looks a little high still ( you could file it & peen some more maybe), for pinning I usually peen the 1st end of the pin about 1mm to fit the washer then, assemble, cut & file the 2nd end of the pin to only about 1mm above the washer when pushed together tight, this allows for a fairly flush peening on the pins without excess mushrooming,
this is not as bad with Brass but nickel silver & Stainless pins like to split at the edges when peened over if left to long
It's great to see blades returned from the dark places they are abandoned to and given a rebirth ready to clear whiskers as they were intended for another life time or 2
Dan.05
Member
The closest thing i have to a before pic is this.Great work mate
you gotta start somewhere cos that's how we learn & definitely no need to rush these things
looks like you have a bit of work to do on the hones for the bevel set, or is the wave in the blade just an illusion
some nice grain in the horn & the new dome Washers look sweet too
have you got a before pic?
are they the original scales or did you make full new ones?
as they look a little big for the blade size that's all?
did you reclaim the wedge or all new also?
I note the pin in the lower pics looks a little high still ( you could file it & peen some more maybe), for pinning I usually peen the 1st end of the pin about 1mm to fit the washer then, assemble, cut & file the 2nd end of the pin to only about 1mm above the washer when pushed together tight, this allows for a fairly flush peening on the pins without excess mushrooming,
this is not as bad with Brass but nickel silver & Stainless pins like to split at the edges when peened over if left to long
It's great to see blades returned from the dark places they are abandoned to and given a rebirth ready to clear whiskers as they were intended for another life time or 2
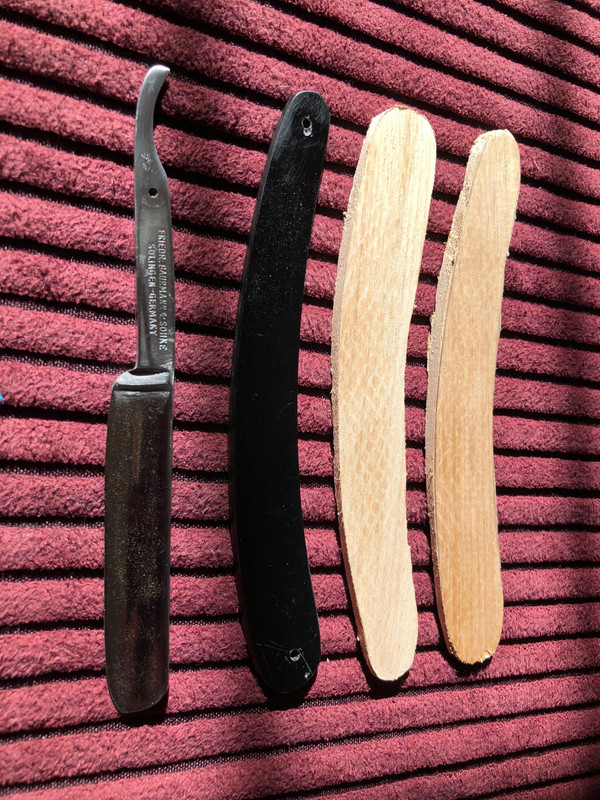
The blade was covered in years of black neglect but i dont have an earlier photo. the black scale is the original and i traced the new from the old. i wanted to make the new scales a more sexy version of the old. I reclaimed the wedge as it was in good nick and I find less complications using the old.
I wasnt finished with the pins. i want to file them down a touch and polish the studs to bring up a nice shine. I just couldnt wait to shave.
No waive in the blade, i think it was just the photo.
i really appreciate your feedback and tips. good learning for me.